About this deal
Precise and flexible heat distribution plays a crucial role in many applications where temperature control system for heating, warm and frost protection in drums, cylinders or hoppers machinery is invaluable in heating technology. As a fulltimer living off lfp/ solar not being able to charge the batteries could be an issue as I recently found out.
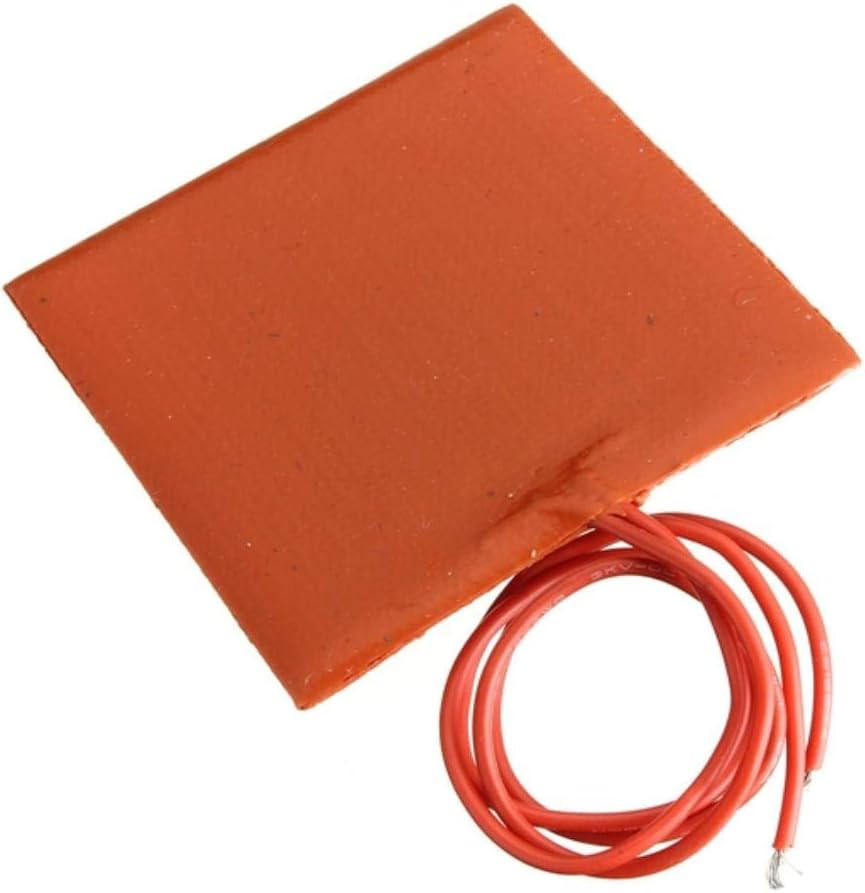
5 Safe 12V Heating Pads to Keep Warm on the Road
I tapped into the heat duct run from the furnace as can be seen in the original post, all that's needed is to remove the cover on the end of the drop down hose for more heat to get pushed into the compartment instead of just radiating off of hose. The compartment has already been insulated fairly well, maybe the entire floor in the front compartment should have a piece of foam/ plywood on it just as a layer of insulation. The heating pad can be connected to the 12v fuse panel with a switch added inline to turn it on/ off if needed. Power consumption should be roughly 6a which would be a little more than 1% an hour of my battery bank, I'm thinking it probably wouldn't need to be used more than an hour or so periodically. Our heat pads come equipped with an ambient temperature sensor. The ambient temperature sensor sits between the battery case and wiring harness, allowing the heat pad to only be turned on when below 35°F. Once the ambient temperature sensor reaches 35°F, the switch is enabled, allowing current to flow to the heat pad.Once the positive and negative terminals have their corresponding ring terminals crimped and attached, you are ready to test the pad! The first step, as with any installation, is to confirm that you have the right equipment. Eric, one our expert sales technicians, walked us through the process of setting up a heat pad with our batteries. A heat pad is best used on the surface of the pet fleece, rather than under it. Up to 1/2 of the floor of the box needs to be heated. This is to avoid the bitch not being able to get away from the warmth when she otherwise needs to cool down. As the temperature sensor needs to fit closely to the battery, make sure to measure your wire length and always leave a little extra length until you are ready to complete the heat pad’s installation.
find a 12volt seed Germination mat. | All About Trying to find a 12volt seed Germination mat. | All About
The Vinyl Pet Heat Pad’s for newborn puppies as they are very vulnerable to chills in their first few days. This is because they cannot control their own body temperature and reply on the bitch for heat. Picasso, I've never seen one of these heating pads in person that's I'm wondering about the placement of it. The ambient temperature sensor should be placed in between the adhesive side of the heat pad and the item wished to be heated (in this case, between the heat pad and the battery). Strip the positive and negative wires from each pair. Once you have stripped all four wires coming out of the heat pad and the additional four wires from the temperature sensor, you are ready to move on to the next step. Take the length of wire and plug it into your positive push-in connector. This should take the fourth and final slot of the positive push-in connector. This will become the positive ring terminal. For this positive terminal, Eric used about 18 inches of wire.
Operation
I'm not even worried about the heat generated from them other than if it will stay on for a period of an hour or so without having it turn itself off being sandwiched in the design I'm thinking about. As I said all cells can be seen/ monitored on a display panel in live time readings. Once the cells warm up it would as simple as turning the heating pad off. I have never bough any type of heating element for a propagator. I started by deciding the approximate power rating I estimated would be required to warm the area I wanted. The voltage was decided by what transformers I has available , (Mostly 12 volts or 24 volts.) From that I worked out the resistance required. I then looked at what wire I had and measured its resistance per meter. (I would actually measure the resistance of several meters as the resistance of one meter would be quite low. ) Among the things I have use have been single conductor copper wire and plastic coated iron garden wire. The wire was then just wrapped round hooks at the end of the frame is a zigzag pattern to use up the calculated length. Sometimes I would wrap the length of wire round a sheet of plywood so it was more or less evenly spaced. I think you will find that you need a very large battery. I would estimate you would need at least 100 watts for the size you require. (And that is assuming you have some thermal insulation under the heating element and some kind of enclosure above the plants. (I also live in Lancashire and those estimates are from what I have used in the past.) Our Battle Born Batteries ship with 18-8 stainless steel 5/16 – 18 1” and 1 ¼’ bolts, brass washers and 18-8 stainless steel nuts with nylon inserts.
 Great Deal