About this deal
Because we will be soldering the LED strings whilst on the frame, I suggest using a higher temperature plastic such as PETG, the mirrors are quite heavy if you use glass so the extra strength is also a bonus.
These are more or less the same as the more common WS2812B (aka Neopixel) LEDs, but are more compact. There are spaces for M3 nuts in the mount_main (like with the center_wire_guide) but you don't need to use them, as it's unlikely to be pulled on with much force.
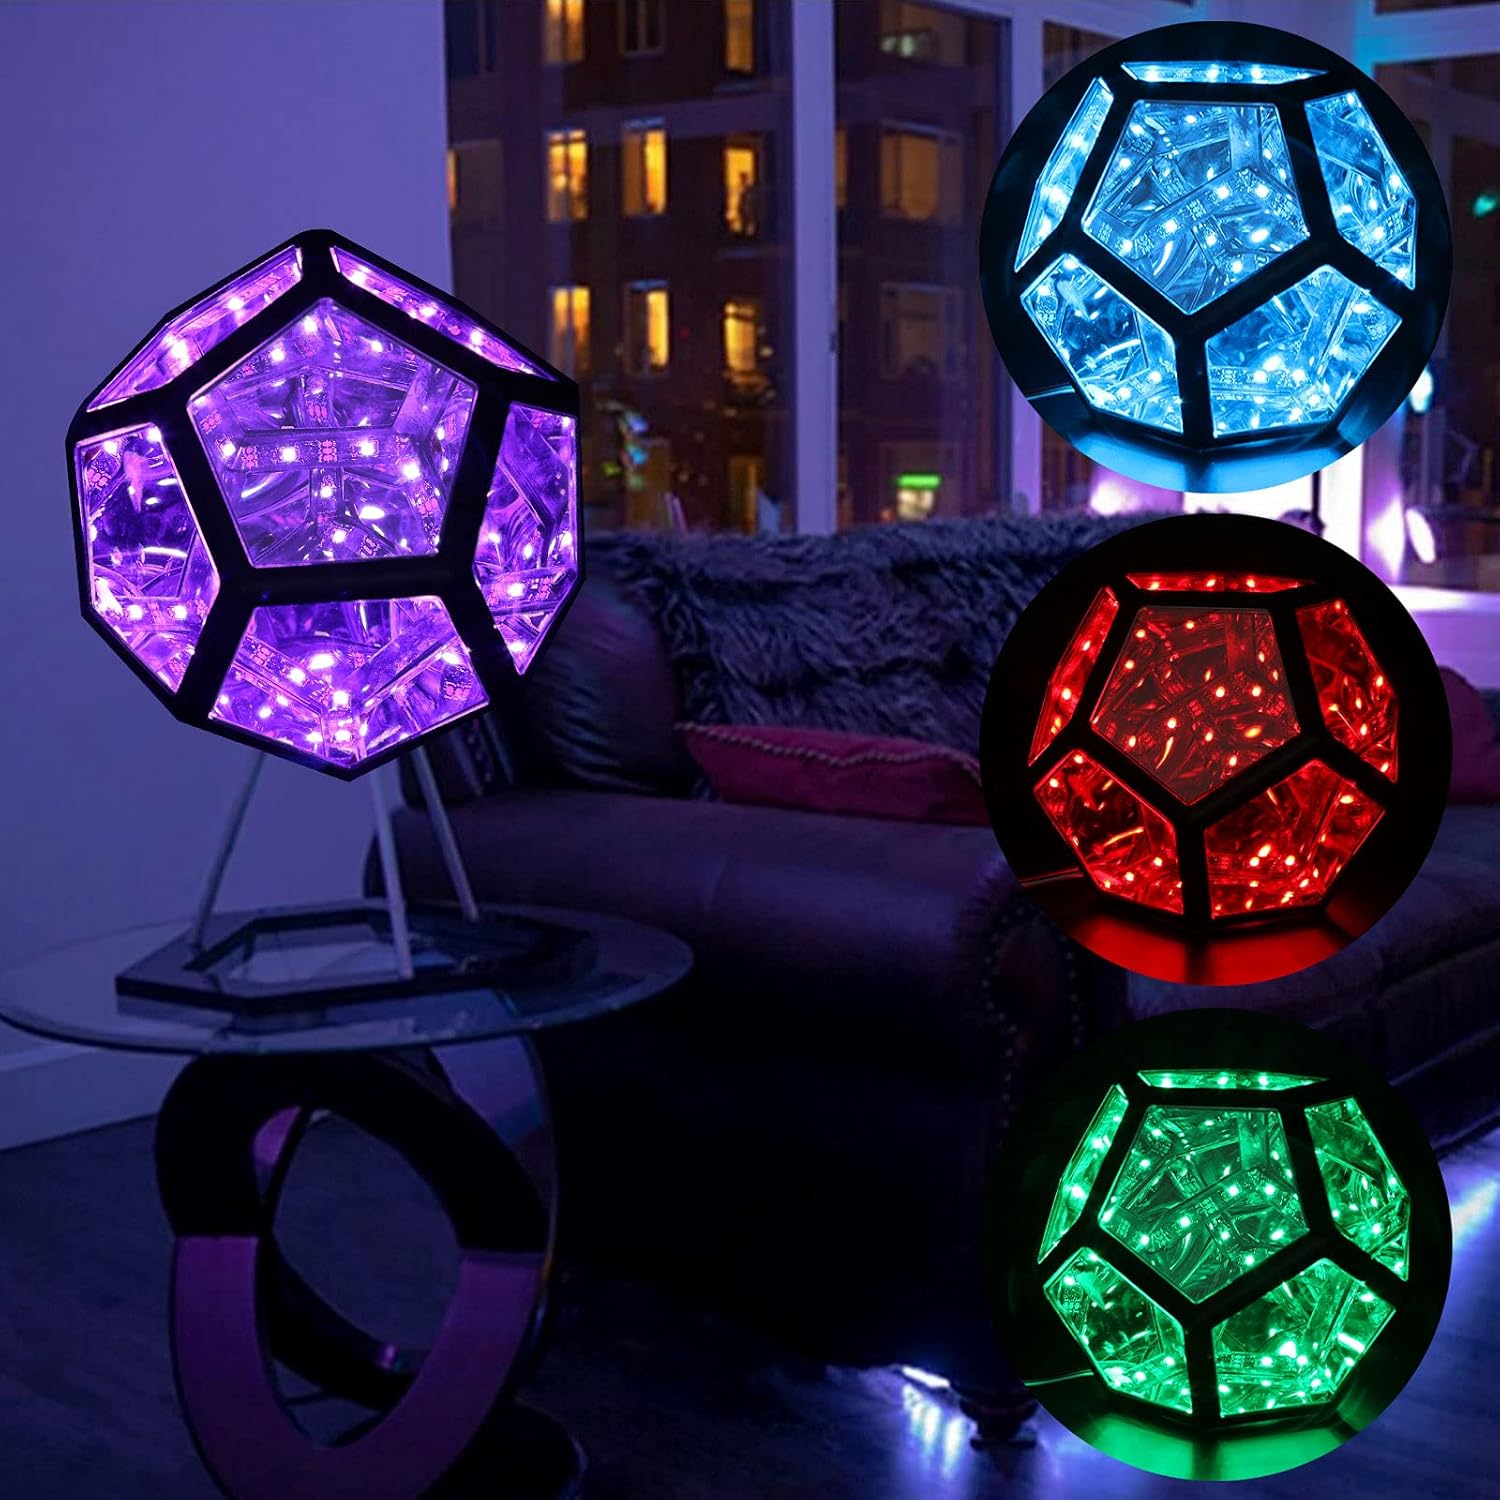
One way mirrors on the faces of the dodecahedron bounce the light from these LEDs around within the shape, creating an infinite space illusion within its walls.
If you need to test the strips you can always build the power box, connect the Arduino (see step 4) and plug it in to test your connections work, I recommend doing a test every couple of strips to make sure everything is working correctly. The files provided have integrated ‘grab plates’, these grab plates increase the surface area at the ends and work like a custom brim which can be removed after printing. If you think you require power injection (see step 2 for more info), you need 12 of these alternate struts to accommodate for this.At this point the dodecahedron is all wired up, we will switch to building the controller before adding the finishing touches to the dodecahedron. To enable personalised advertising (like interest-based ads), we may share your data with our marketing and advertising partners using cookies and other technologies. One-way mirrored film usually has a protective plastic layer on the adhesive side so you will need to remove this (also under water) before placing the film on top of the acrylic sheet. I would not recommend this project to a beginner, but if you have experience soldering in tight places you shouldn't have too many problems.
The remaining data pad is used to "double back" the data to a new strip that is not connected to the PCB. Soft Dimmable Lighting】You can change the color of the light through the button on the USB line to meet all the styles you want. I had 7 strips blow up on me when testing during the soldering phase so I’m telling you from experience. They are arranged into lengths of seven LEDs on each of the dodecahedron's 30 edges, for a total of 210 LEDs. In this project, I learned how to design a PCB and got a little bit more experience with electronics, Arduino programming, and Fusion 360.Start with the 3 power input struts and glue one pin into the left side hole on one end of each strut. It is an excellent lighting decoration choice for home, living room, bedroom, children's room, bedside, office, and other desktop decorations! Prioritizing ease of maintenance and durability, we design our luminous artworks to withstand the test of time.
This took a few iterations to get right, fusion tells me my part is on "v54" but that's mostly because I was saving intermittently. We want the DC jack to be center positive, which means that the positive line is connected to the central pole inside the jack. Overall the controller is simple: 5V power is supplied through a DC jack, which also connected to a switch to turn it on/off. The ratings/reviews displayed here may not be representative of every listing on this page, or of every review for these listings. When gluing to the frame, this wire is pushed through the small tunnel in the 3D print so that it comes out on the data input side, to go to the next strip.Download all the files and place them in a folder named "PixelStrip" in the libraries folder of your Arduino install directory. On some sections, the arrows point away from where the next section begins, for example on edge 15 to 16. This is more easily done off of the dodecahedron because you'll need access to both sides of the PCB. If you would like to add buttons later you can optionally bridge all but the D8 pad (which is used to drive the LEDs). By pressing on the pads of the LED strip with the male ends, you should be able to get the LEDs to light up.
 Great Deal